# Animations
There are multiple ways to add animations to Qt Quick 3D scenes. The most basic one is to move, rotate, and scale Model elements in the scene. However, in many cases, we want to modify the actual meshes. There are two basic approaches to this: morphing animations and skeletal animations.
Morphing animations lets you create a number of target shapes to which various weights can be assigned. By combining the target shapes based on the weights, a deformed, i.e. morphed, shape is produced. This is commonly used to simulate deformations of soft materials.
Skeletal animations is used to pose an object, such as a body, based on the positions of a skeleton made of bones. These bones will affect the body, thus deform it into the pose required.
For both types of animations, the most common approach is to define the morphing target shapes and bones in a modelling tool, and then export it to QML using the Balsam tool. In this chapter we will do just this for a skeletal animation, but the approach is similar for a morphing animation.
# Skeletal Animations
The goal of this example is to make Suzanne, the Blender monkey head, wave with one of her ears.
Skeletal animation is sometimes known as vertex skinning. Basically, a skeleton is put inside of a mesh and the vertexes of the mesh are bound to the skeleton. This way, when moving the skeleton, the mesh is deformed into various poses.
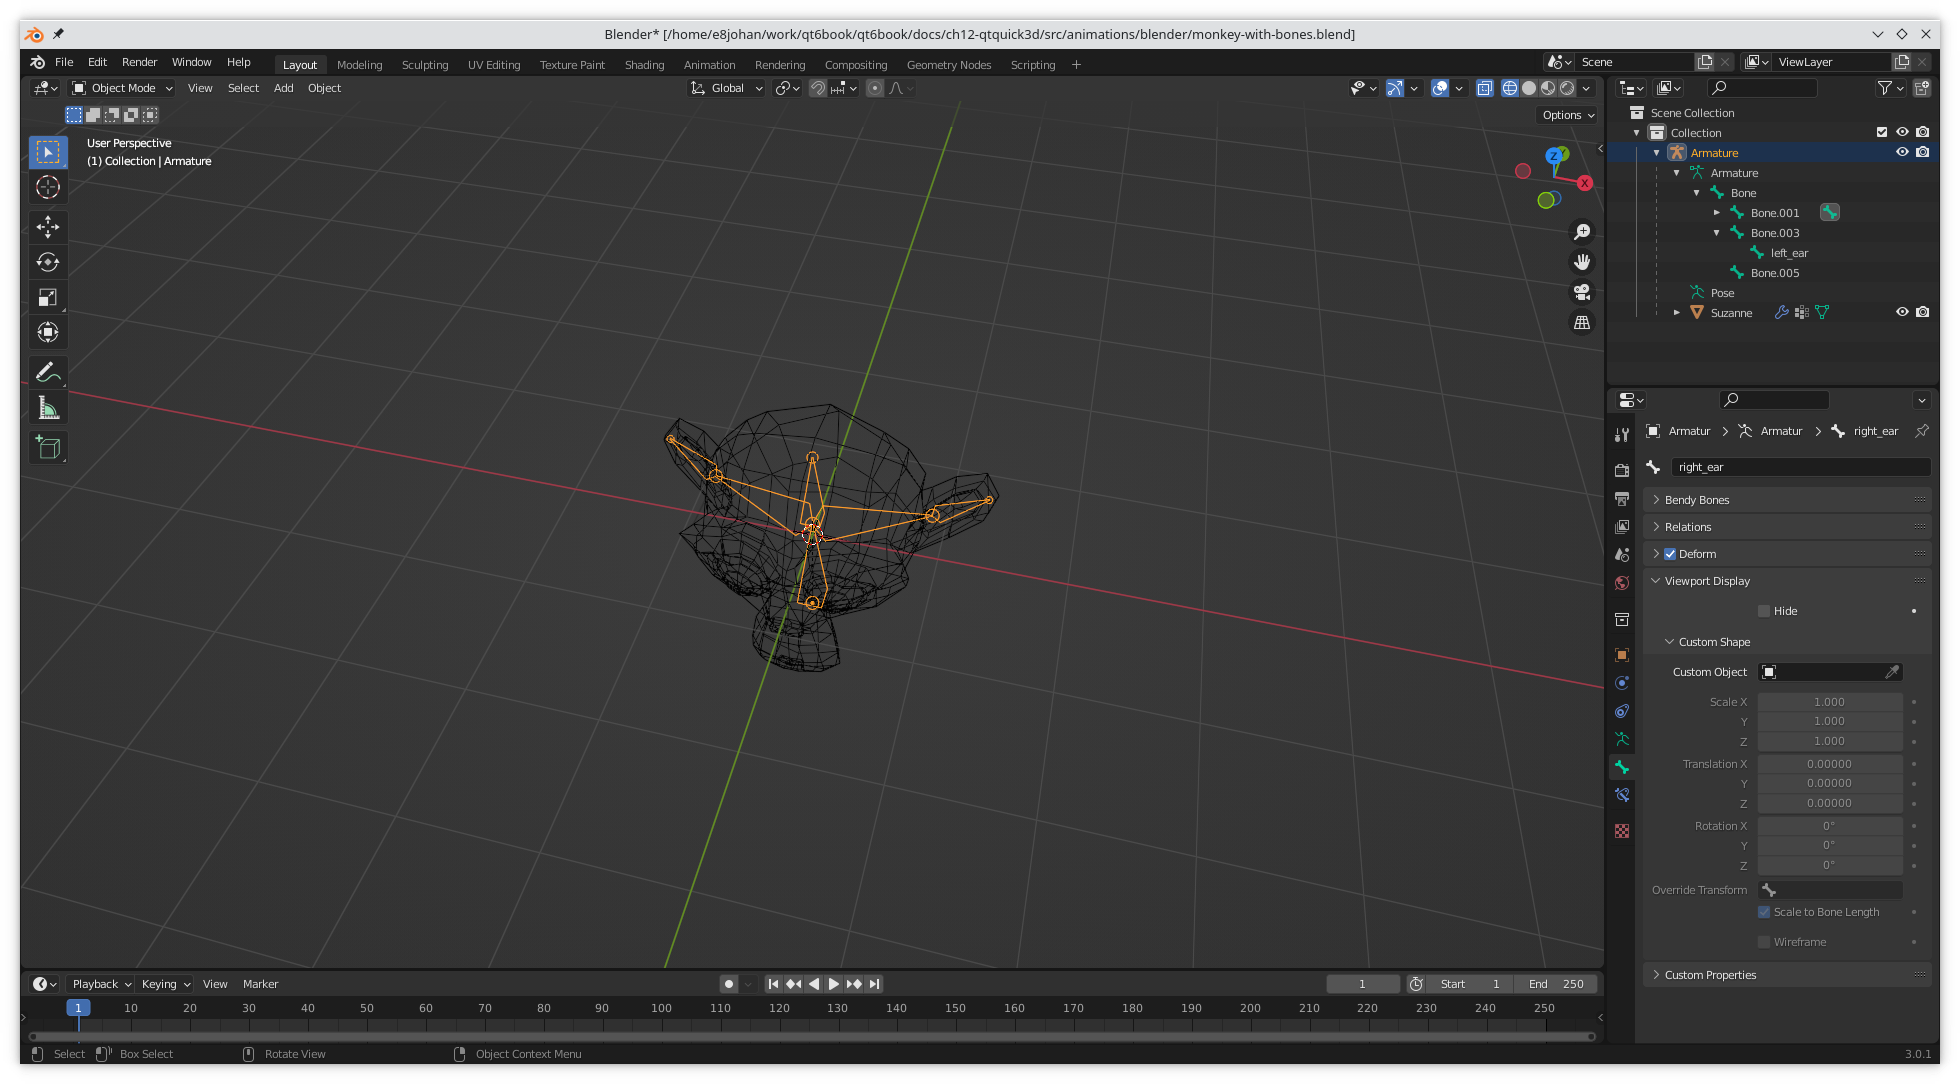
As teaching Blender is beyond the scope of this book, the keywords you are looking for are posing and armatures. Armatures are what Blender calls the bones. There are plenty of video tutorials available explaining how to do this. The screenshot below shows the scene with Suzanne and the armatures in Blender. Notice that the ear armatures have been named, so that we can identify them from QML.
Once the Blender scene is done, we export it as a COLLADA file and convert it to a QML and a mesh, just as in the Working with Assets section. The resulting QML file is called Monkey_with_bones.qml.
We then have to refer to the files in our qt_add_qml_module statement in the CMakeLists.txt file:
qt_add_qml_module(appanimations
    URI animations
    VERSION 1.0
    QML_FILES main.qml Monkey_with_bones.qml
    RESOURCES meshes/suzanne.mesh
)
Exploring the generated QML, we notice that the skeleton is built up from QML elements of the types Skeleton and Joint. It is possible to work with these elements as code in QML, but it is much more common to create them in a design tool.
Node {
    id: armature
    z: -0.874189
    Skeleton {
        id: qmlskeleton
        Joint {
            id: armature_Bone
            rotation: Qt.quaternion(0.707107, 0.707107, 0, 0)
            index: 0
            skeletonRoot: qmlskeleton
            Joint {
                id: armature_Bone_001
                y: 1
The Skeleton element is then referred to by the skeleton property of the Model element, before the inverseBindPoses property, linking the joints to the model.
Model {
    id: suzanne
    skeleton: qmlskeleton
    inverseBindPoses: [
        Qt.matrix4x4(1, 0, 0, 0, 0, 0, 1, 0.748378, 0, -1, 0, 0, 0, 0, 0, 1),
        Qt.matrix4x4(),
        Qt.matrix4x4(0.283576, -0.11343, 0.952218, 1.00072, -0.884112, 0.353645, 0.305421, -0.669643, -0.371391, -0.928477, 1.19209e-07, -0.0380237, 0, 0, 0, 1),
        Qt.matrix4x4(),
        Qt.matrix4x4(0.311833, 0.101945, -0.944652, -1.01739, 0.897887, 0.29354, 0.328074, -0.648326, 0.310739, -0.950495, 0, 0.0303747, 0, 0, 0, 1),
        Qt.matrix4x4()
    ]
    source: "meshes/suzanne.mesh"
The next step is to include the newly created Monkey_with_bones element into our main View3D scene:
View3D {
    anchors.fill: parent

    Monkey_with_bones {
        id: monkey
    }
And then we create a SequentialAnimation built from two NumberAnimations to make the ear flop forth and back.
SequentialAnimation {
    NumberAnimation {
        target: monkey
        property: "left_ear_euler"
        duration: 1000
        from: -30
        to: 60
        easing: InOutQuad
    }
    NumberAnimation {
        target: monkey
        property: "left_ear_euler"
        duration: 1000
        from: 60
        to: -30
        easing: InOutQuad
    }
    loops: Animation.Infinite
    running: true
}
Caveat
In order to be able to access the Joint's eulerRotation.y from outside of the Monkey_with_bones file, we need to expose it as a top level property alias. This means modifying a generated file, which is not very nice, but it solves the problem.
Node {
    id: scene

    property alias left_ear_euler: armature_left_ear.eulerRotation.y
    property alias right_ear_euler: armature_right_ear.eulerRotation.y
The resulting floppy ear can be enjoyed below:
As you can see, it is convenient to import and use skeletons created in a design tool. This makes it convenient to animate complex 3D models from QML.